As an Amazon Associate I earn from qualifying purchases. This does not affect the price you pay when purchasing.
One of things I regretted when purchasing my JL was not upgrading to the Alpine System, although what I did ended up sounding way better than the factory Alpine system anyway. In the following post I’ll go over briefly what I did to improve the Sound System in my JL.
Parts List:
- Kicker IQ1000.5 Amplifier with built in DSP
- JL Audio C2-400X 4″ Coaxial Speakers – These will go in the sound bar. You also can use these for the Speakers on the lower kick panels.
- JL Audio C2-350x 3.5″ Coaxial Speakers – These will go in the top Dash.
- JL Audio 10TW3 Subwoofer in Enclosure – This is a good shallow mount sub and enclosure.
- PAC AP4-CH41 Amp Adapter for Chrysler, Jeep, Dodge Vehicles – This is tricky as its only for those vehicles with the upgraded amplified audio. If you don’t have the factory amplifier you need to find the REVISION 2 Model. I found mine on eBay.
- Car Amplifier Wiring Kit – You can pretty much use what you want here. I ended up not even using the RCA cables it came with nor the speaker wire. It was just too thin and cheap.
- Metra 72-6514 Speaker wiring adapter – These are so you can install the 4″ speakers into factory speaker plugs.
Step 1 – Run the Wire for Amplifier
I’m going to spare you the long details as by now most of you have probably run wire before in your Jeep. I chose to go through the driver side grommet under the brake booster. I ran the Amp Power wire from the battery along the rear of the engine bay and in through the grommet. I ran the wire inside along the trim panel and then under the rear seat. I then bolted the Ground Wire to the passenger seat mounts as my Amp will go under the passenger seat.
Step 2 – Install the PAC Adapter
This is pretty much Plug and Play. The speaker Wires from the AMP will splice into the White, Green, Gray and Purple wires that plug into the harness.
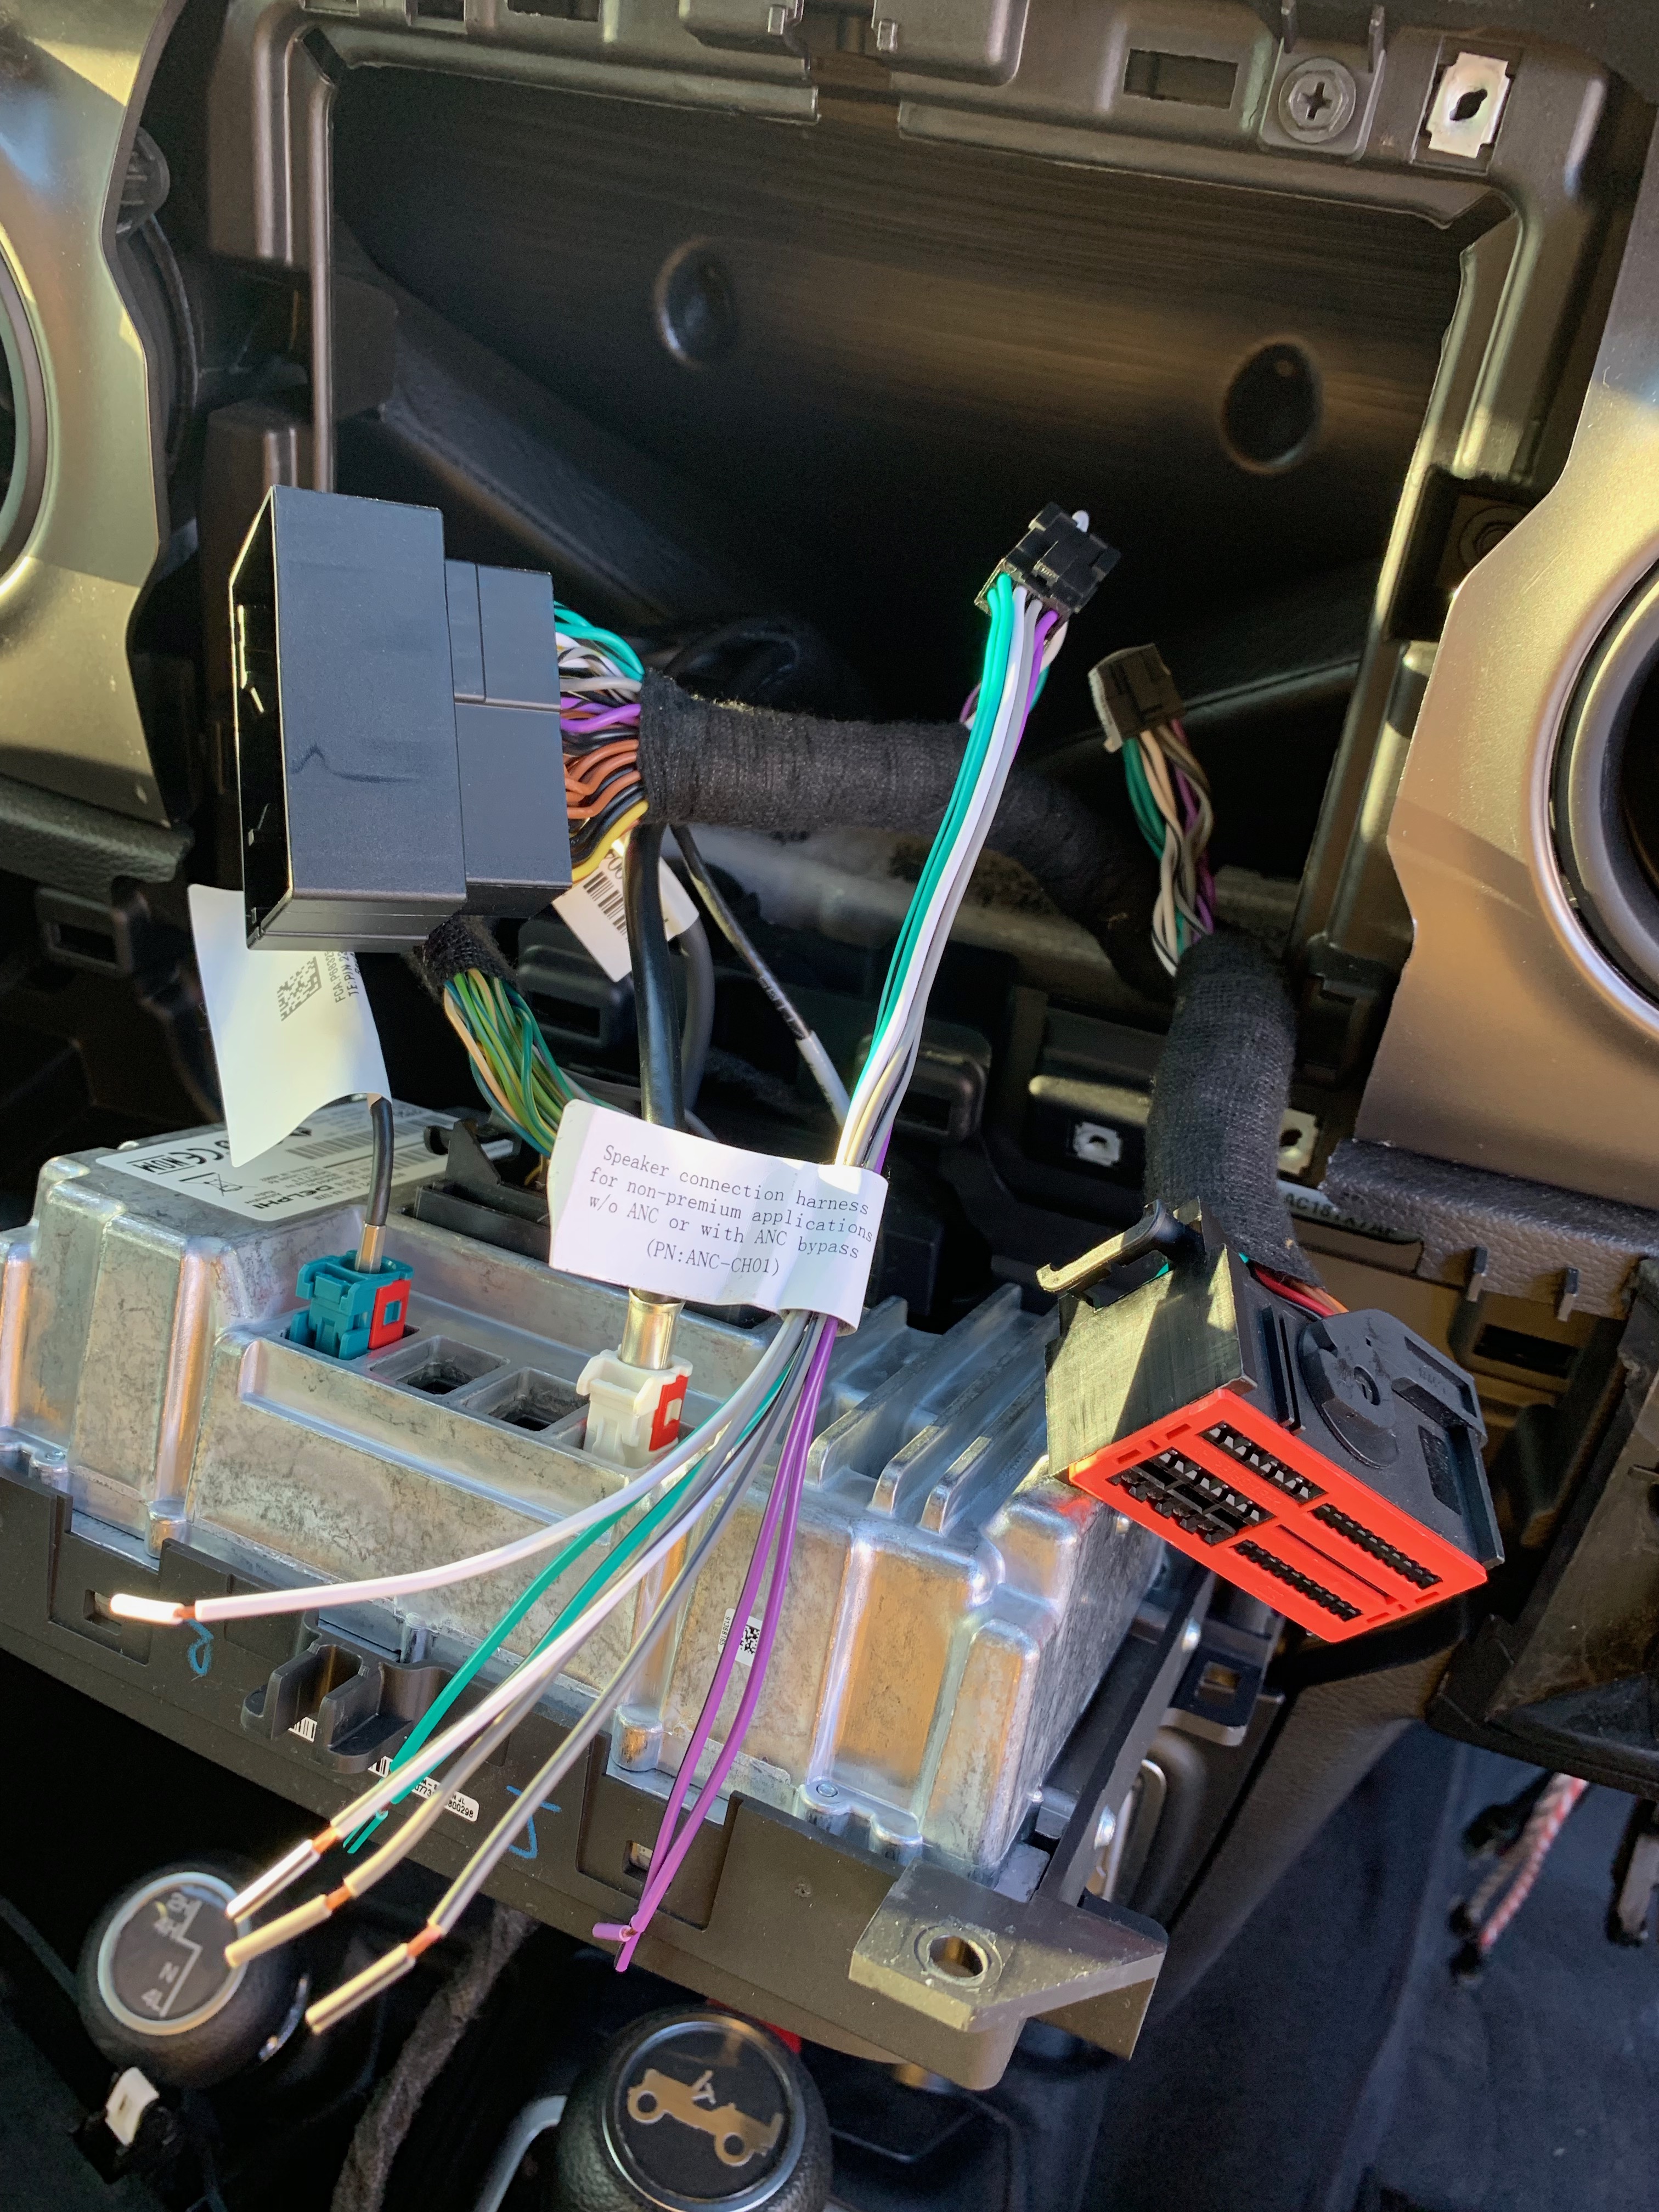
*Please Note that the PAC Adapter connects to the factory speakers locations which are connected in parallel so the White Wires are Left Front, Grey is Right Front, Green is Left Rear and Purple is Right Rear. So even though the JL has 8 speakers, Its really 4.
Step 3 – Run the speaker wire and RCA cables from the location you will install amp to the PAC Adapter module.
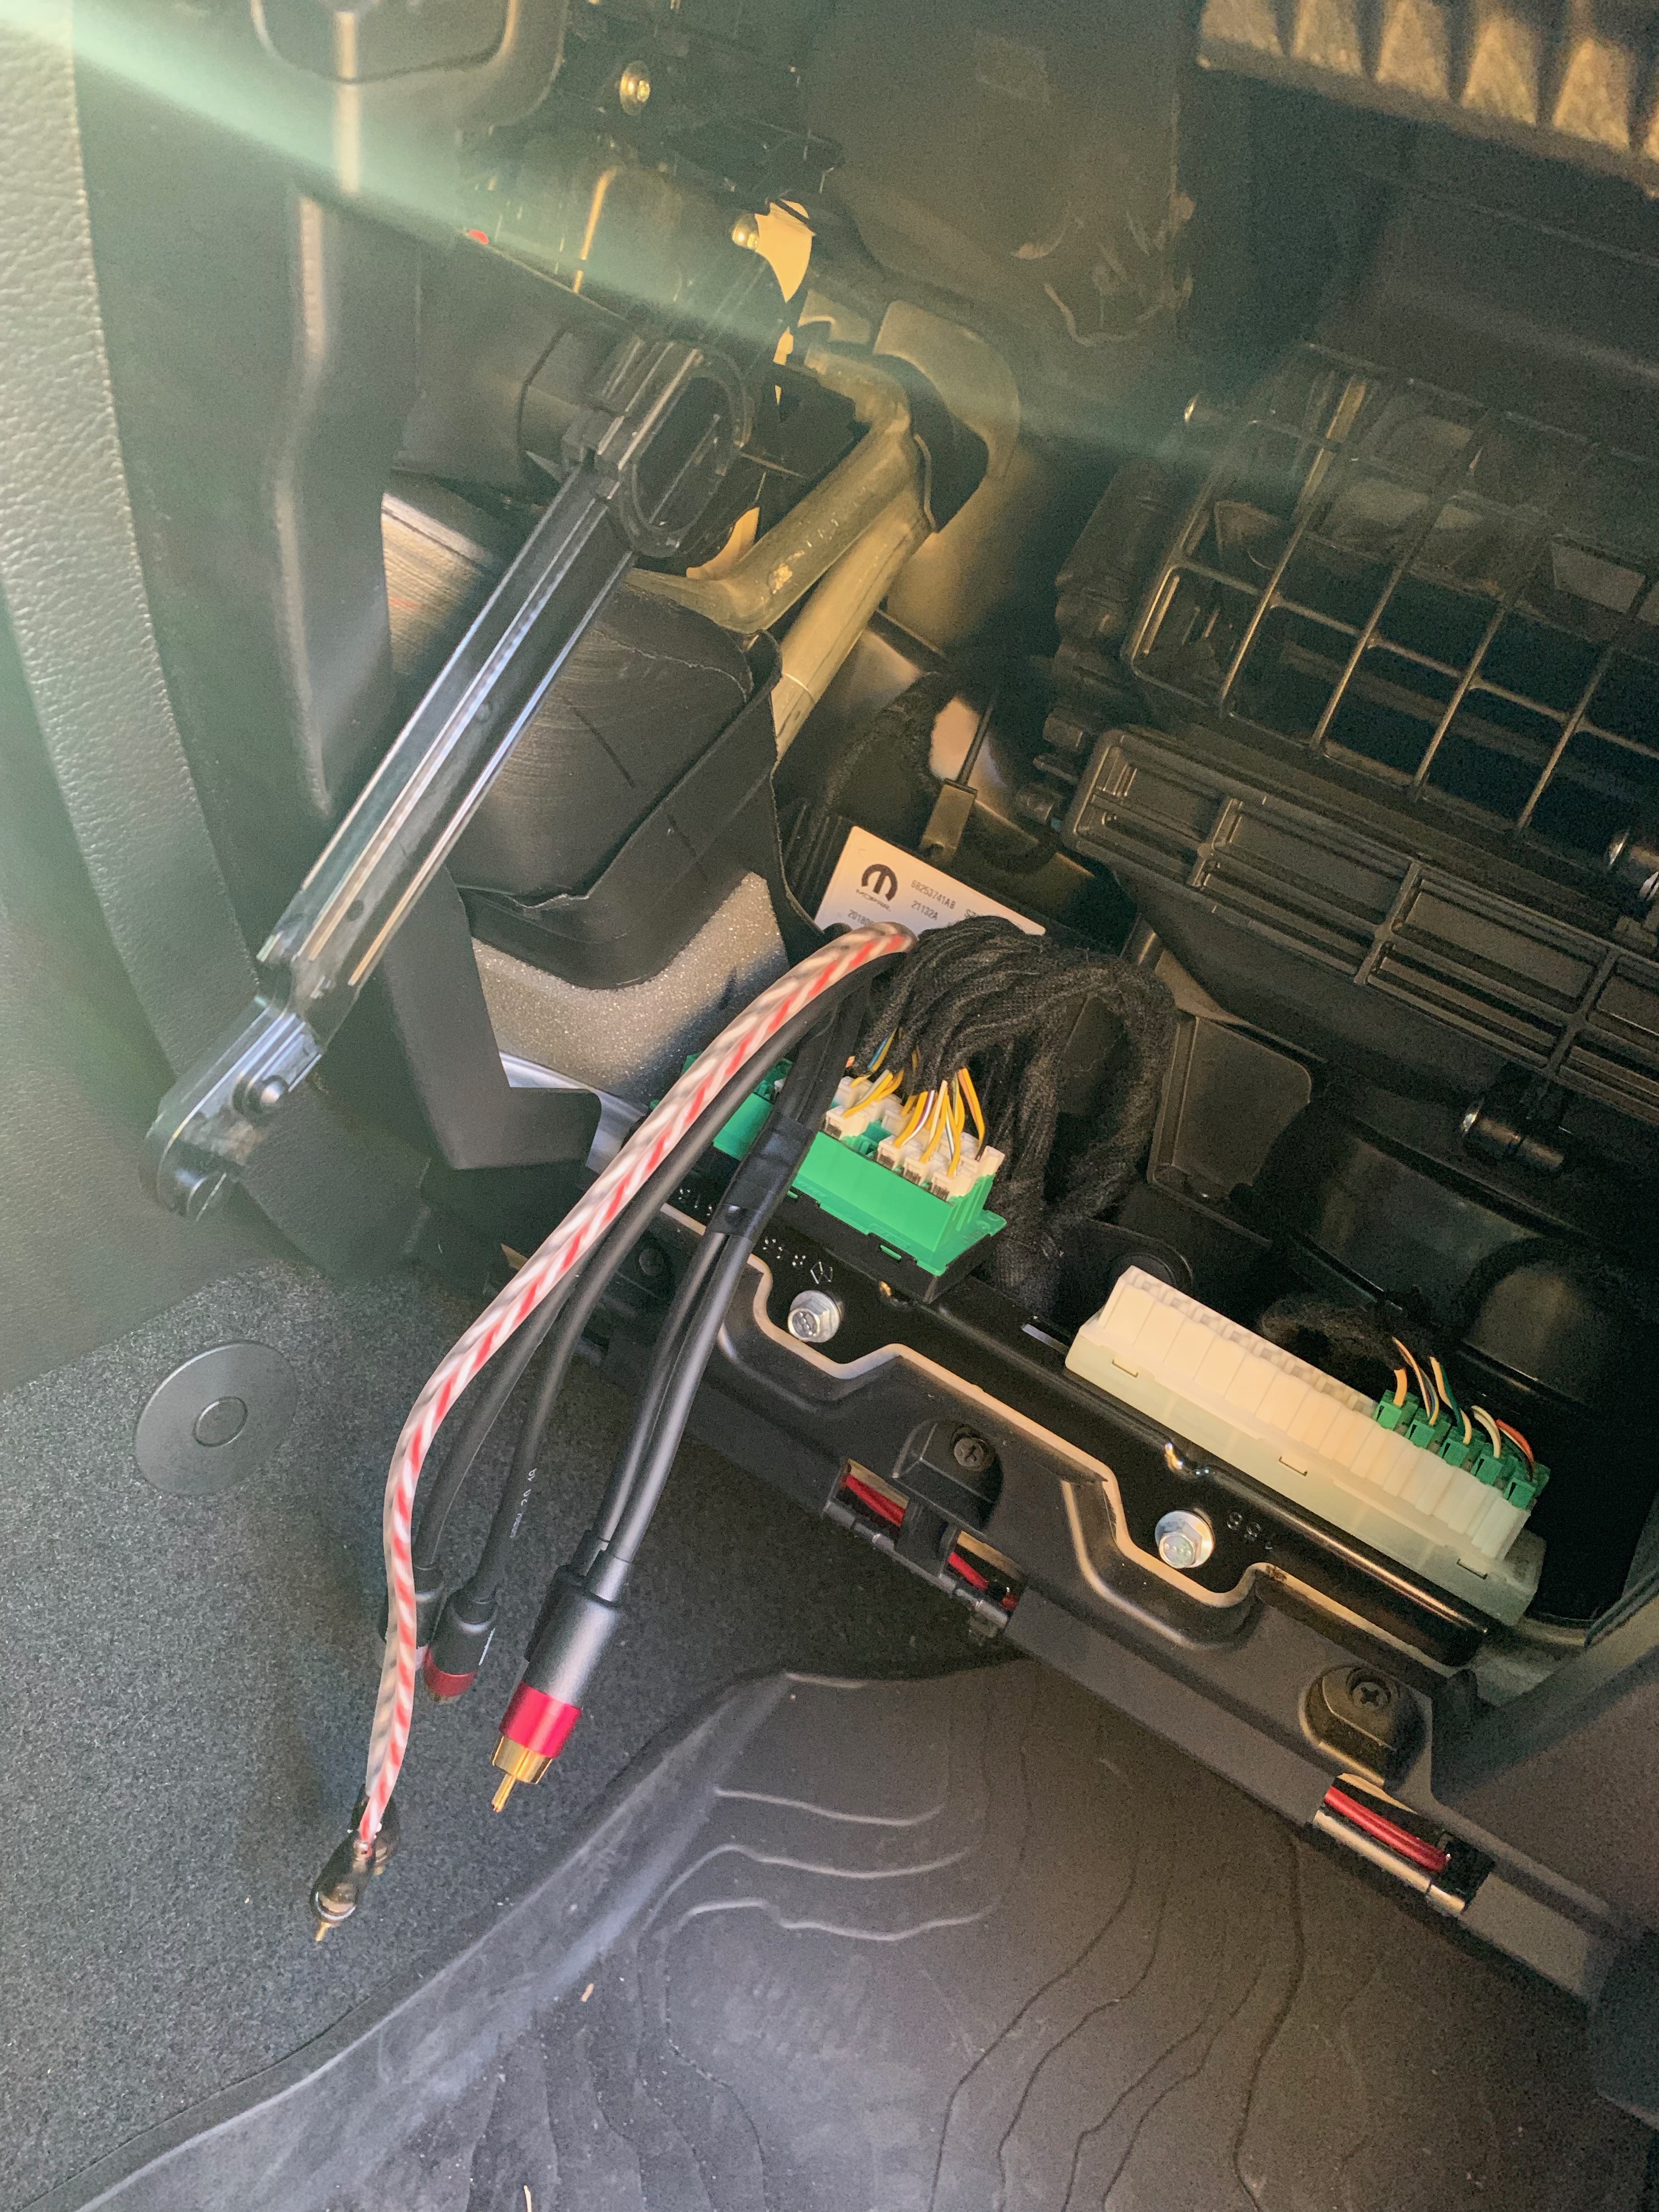
The picture above doesn’t show the speaker wires but you get the idea.
Step 4 – Connect the RCA Cables to the PAC Adapter

Its pretty self explanatory here. Connect the RCA cables that go from Sub Channel on AMP to the SUB RCA connectors on the PAC, the Front Speakers from the 1-2 Channels on AMP to FRONT on PAC and REAR to Channels 3-4 on amp.
The Harness from the Wiring Adapter that gets plugged into the factory Radio will plug to the top section on “Vehicle Harness”. You can’t go wrong here.
Step 5 – Connect all the wiring to the AMP and Connect Power to Battery
The PAC Adapter has a 12v Ignition wire that is used to power on the AMP. You need to run that wire as well. All you just need to run a speaker wire from the subwoofer speaker connector on the AMP to the back of the jeep or wherever you decide to mount the subwoofer.
Then all that is needed is to connect everything to the Battery and AMP and follow the instructions on the PAC Adapter. There is a specific start up sequence you need to do to make the factory radio recognize the Pac Adapter. As for the amplifier, you will need to plug in a computer or laptop the USB port and configure the DSP. This is a MUST for it to sound good.
Conclusion
I am very happy with the upgraded audio. This thing bumps!! Another thing I strongly recommend and ended up doing after this install was upgrading the factory 5″ radio to the 7″. It makes a huge difference and having Apple CarPlay is nice.
Amazon and the Amazon logo are trademarks of Amazon.com, Inc, or its affiliates.